Mastering the Exposure Triangle
Any time friends start getting into photography or are getting a camera and ask for advice, I always emphasize how crucial learning what photographers call the “exposure triangle” first off. Photography is as much about technical knowledge as it is about creativity. One of the most fundamental concepts every photographer should master is the exposure triangle. This trio of settings—aperture, shutter speed, and ISO—controls how light interacts with your camera’s sensor, ultimately shaping the final image. Let’s break down these three elements and explore how they work together to create a well-exposed photograph.
What is the Exposure Triangle?
The exposure triangle represents the relationship between three core settings in your camera:
Aperture (f-stop): The size of the lens opening that allows light into the camera.
Shutter Speed: The duration the camera’s shutter remains open to let in light.
ISO: The sensitivity of your camera’s sensor to light.
Each of these settings affects the exposure of your image, and changing one typically requires adjusting another to maintain balance. Understanding their interplay is key to achieving the desired look in your photos.
Aperture: Controlling Depth of Field
The aperture is like the pupil of your eye. It can widen or narrow to control how much light enters the camera. Aperture is measured in f-stops, such as f/2.8, f/5.6, or f/16.
Wide Aperture (Low f-number): More light enters, creating a shallow depth of field. This results in a blurred background, ideal for portraits.
Narrow Aperture (High f-number): Less light enters, creating a deep depth of field. This keeps more of the scene in focus, perfect for landscapes.


Shutter Speed: Freezing or Blurring Motion
Shutter speed controls how long the camera’s shutter stays open. It’s measured in seconds or fractions of a second, such as 1/1000s, 1/60s, or 5s.
Fast Shutter Speed: Freezes motion, great for sports or wildlife photography.
Slow Shutter Speed: Introduces motion blur, ideal for capturing light trails or silky water effects.
A slower shutter speed requires stability, so using a tripod can be essential to avoid camera shake.


ISO: Adjusting Light Sensitivity
ISO determines the sensor’s sensitivity to light. Common ISO values range from 100 to 6400, but many modern cameras can go higher.
Low ISO (e.g., 100): Produces minimal noise but requires more light. Best for well-lit conditions.
High ISO (e.g., 3200): Allows shooting in low light but introduces more noise (graininess) in the image.
Typically the lowest ISO possible is preferred to preserve the quality of the image with the lowest noise threshold.
Balancing the Triangle
The key to using the exposure triangle is balance. For example:
Scenario 1: Portrait Photography
You want a blurred background (wide aperture) to alienate your subject somewhat from their surroundings but find the image too bright. To compensate, you can use a faster shutter speed or lower the ISO. The noise contributed by a higher ISO can often be a creative decision for certain styles of portraits, in which case a faster shutter speed is the first option to use. If going for a cleaner look, you want to drop the ISO as close to your base number as possible before moving on to faster shutter speeds.
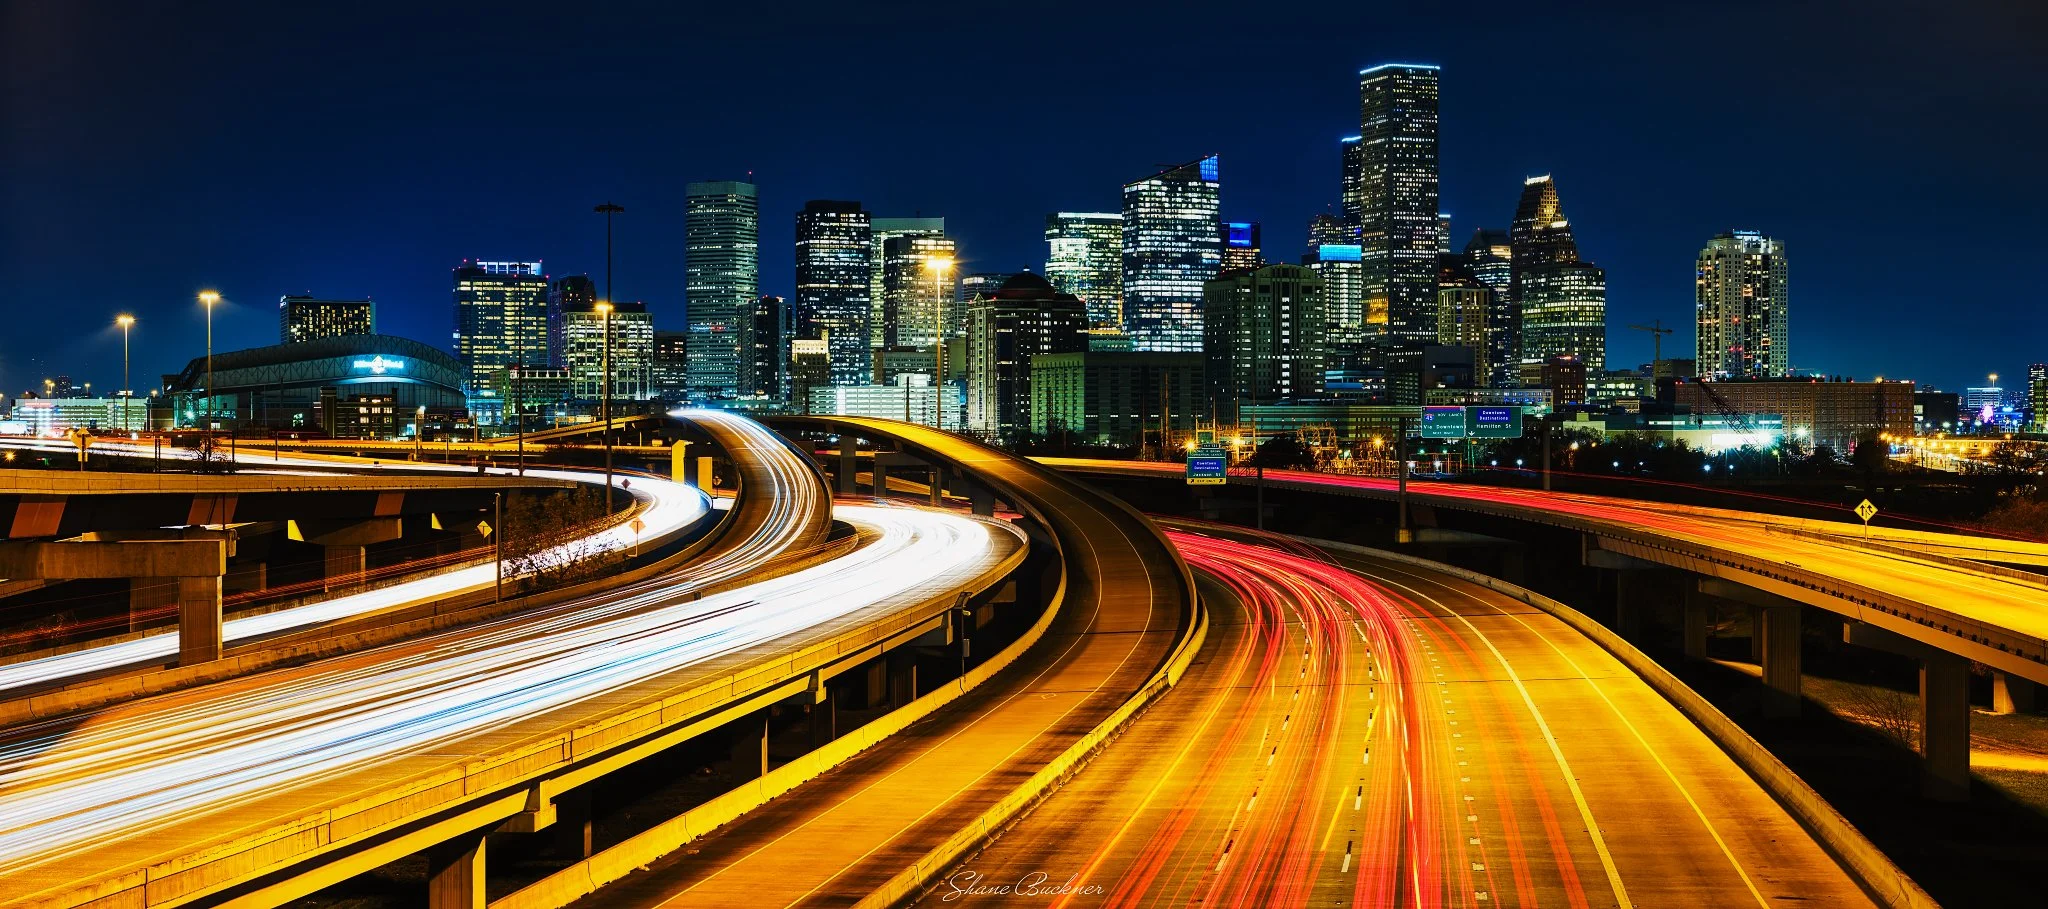
Scenario 2: Night Photography
You’re shooting a starry cityscape at night with low available light. You most likely need to use all of the exposure triangle to get the required light. You might want to set your aperture as wide as possible and use a slower shutter speed. Once you find the slowest shutter speed that still allows you to retain sharp star points, you can then increase the ISO to get your exposure where you want it. Now if you want star trails, you will be slowing the shutter speed even further to capture more of the earth's rotation.


Scenario 3: Landscape Photography
You’re shooting a landscape scene of a mountain with a lake in front of it at sunrise. The light is beginning to fade. You want to use a narrower aperture, such as f8-f11, to ensure the depth of field is wide enough to include all of the intended subjects. You want to avoid a high ISO to limit the added noise in the image. Instead you want to slow down the shutter speed first to compensate as best as possible. The slower shutter speed will mean that the water gets smoothed out from any motion due to wind. Any clouds in the scene will be similarly smoothed out and lose texture as well as show any lateral movement. If this effect is not desired, you then raise the ISO to find the right balance for your creative vision.


Every change you make to one element of the triangle affects the others. Practicing this balancing act will help you achieve creative control over your images.
Tips for Mastering the Exposure Triangle
Start with Aperture Priority Mode: Start out using aperture priority mode, where you set the aperture to the desired setting and then allow the shutter speed and ISO to automatically adjust accordingly. This will help you start seeing how the settings compensate for each other.
Use Manual Mode: Once comfortable with how various aperture settings have a visual impact, start experimenting with full manual mode to adjust aperture, shutter speed, and ISO individually.
Practice in Different Lighting Conditions: Experiment with various scenarios, like bright daylight, dusk, or dim interiors.
Leverage the Histogram: Your camera’s histogram can help you evaluate exposure, ensuring you’re not clipping highlights or losing shadow details.
Take Notes: Pay attention to how changes in one setting affect your images. Over time, this will become second nature.
Conclusion
Understanding the exposure triangle is a stepping stone to elevating your photography skills. It gives you control over how light shapes your images, helping you create stunning photos that align with your creative vision. So grab your camera, experiment with these settings, and watch your photography transform!